


(Translate this site)
Salvaging the hard drive from a dead Apple Powerbook G4; |
(Translate this site) |
|
When my brother-in-law dropped off the PowerMac G4 for repairs, he also left his dead Powerbook G4.
If I recall correctly, he'd thought it was overheating one day (I believe there was an overheating issue in the news about these things a couple years back), and so stuck it in a freezer to cool it off.
Afterwards it wouldn't run, and when he took it to a repair guy was told the motherboard was cracked, and it might cost oodles of money to fix.
When he showed up with it here, sure enough, you could plug it into a power source and get the glow around the power plug, but trying to turn it on brought zilch results. Absolutely nothing happened. No display, so whirring of fans or drives. Nothing. So right off the bat you couldn't try lots of the usual tricks to resurrect it.
So basically he'd given up on the laptop months before. Maybe longer. It could have been sitting dead at his house for a year or more.
But now he hoped I could maybe somehow salvage his substantial iTunes collection off the laptop's hard drive.
Please keep in mind it'd now been years since I did any heavy duty computer tinkering and troubleshooting-- especially of the hardware kind, when he was dropping off the dead laptop and the badly mangled desktop. Plus, the desktop was the priority, and the laptop already marked as a lost cause.
Also, I was terribly busy with all sorts of backlogged work of my own, due to my surgeries and way too adventuresome recoveries (adventure is not something you want in medical recoveries).
My old geezer brain might not be working as well as some years back, either.
So maybe I didn't approach the repairs on these machines in as savvy a way as I might have ten years ago, when I had more time, and a younger noggin. Plus, was performing such duties on practically a regular basis.
I put off the laptop work until after the G4 was up and running again.
After seeing the dead laptop firsthand, and questioning my brother-on-law about things he'd tried, etc., I just assumed the laptop was toast. But maybe the hard drive might still be salvaged somehow.
In the past I'd used commercial utilities to fix hard drive problems, plus extract data. But it appeared the laptop job would go beyond my previous efforts. And today I possess no commercial software to possibly aid my efforts but for whatever utilities might come bundled from Apple itself.
I wasn't sure where to begin with the laptop. Even in regards to the proper way to disassemble the thing. So I did some net searching, sort of thrashing around, looking for ideas. And finally came to the conclusion my best option might be to remove the drive from the laptop and fit it into an enclosure, to basically turn it into an external hard drive, and try accessing it that way.
A random ordered sampling of what I ran across includes:
Slashdot | Advice for a Novice Replacing Laptop Hard Drive?
using a laptop hard drive in a desktop - Google Search (early on I thought I might try transplanting the laptop drive into an empty drive bay in the desktop G4 to minimize cost and trouble)
Apple - Support - Discussions - Installing new hard drive into ...
3.5" hard drive on laptop/Mac Mini internal IDE | Applefritter
Powerbook G4 Hard Drive Upgrade Guide part 1 and part 2
External Hard Drives Buying Guide - Computer Shopper
Macworld | Mobile Mac | Upgrading the MacBook Pro's hard drive
I found a site at PowerBook G4 Al 15" 1.5/1.67 BT 2.0 LR Disassembly: PowerBook Parts which seemed to provide a decent guide to the process.
Unfortunately, the site listed a T-6 Torx screwdriver as necessary for the task. My smallest Torx was a T-10. So I had to buy a new tool. A screwdriver with interchangeable tips, which included a T-6.
I next prepped for the procedure by gathering up the rest of the necessary tools and auxiliary lighting, including my wrist grounding strap.
I also emailed myself on Yahoo email the URL of the site mentioned above, so I could access it on a PC desktop situated in the same room where the operation would be performed, only some four feet from the laptop.
Although it sounded like I didn't have to worry about hurting the laptop-- or ever reassembling it again-- still I took the precautions of using my wrist grounding strap, plus saving every screw and other item removed, and trying to note where different length screws belonged as well, just in case.
And let me tell you, the different screw situation on this machine is significant! Especially if you plan on putting everything back together again.
I thought I'd never get the thing open, there were so many screws to remove.
I was well stunned to see the seemingly slipshod manner in which the keyboard and track pad were connected to the motherboard on this machine.
Rather than use a type of connector I was accustomed to, the cable end just sort of sat atop a tiny junction which looked like a sacrificial alter carved in ancient times, on the motherboard.
And when I say sat there, I mean it: it just lay there.
So how the hell did it stay properly connected?
A piece of transparent tape held it in place there. It resembled Scotch tape, but was tinted brown, and not nearly so sticky.
If this had been my own expensive Apple laptop, that I'd paid thousands of dollars for, I would have been pissed off by this.
Maybe PC laptop makers do the same thing these days. But I've personally never seen anything like this before.
Man! I thought. I'd sure hate to be someone who had to get that keyboard connector properly fastened back again later! Sheesh!
I followed the instructions on the site as best I could (there were a few omissions and mistakes there, but overall they do a decent job). I especially appreciate how they listed the mm length of many of the screw types encountered-- that can help you sort out some confusing notes on the subject.
One surprise was where it turned out the T-6 tip listed at the start of the article wasn't exactly the proper tool you should be using, but rather an improvisation by the writers. Yikes! That's not nice to do to readers!
Fortunately the T-6 worked. But not being the precise tool you should be using for the job puts the fasteners at risk for ruination. So you have to make sure the tip is securely inserted, and gently pressure the fastener to turn, to reduce the risk.
Another slight divergence between the web site and reality was the need to maneuver the hard drive from underneath a red and black cable to get it out.
Luckily, I still had the anti-static bag the desktop G4's second hard drive had come in, and so slipped the tiny laptop drive inside it. Then stowed it away in a safe place until the next stage got underway.
I sometimes wonder how regular folk ever successfully repair or upgrade their computers. For such things can often be costly, confusing, and scary even for elder geeks like myself.
Thank goodness for the internet! Although it can still require oodles of time to get the correct answers to lots of questions, at least you've often got a shot, anyway!
In this particular case, I was able to gather lots of good general purpose info on transforming the internal drive to an external one-- but frustratingly little info on what specific brand enclosures would be the best to go with. Doh!
Something else I was also pondering at this time was the possibility of me getting to keep the drive after my brother-in-law got his iTunes off it (if I could get it to work). For I've been running short of storage space on my own PC. And 80 new GB would help a lot!
Too, USB 2.0 only enclosures seemed to be cheaper than combo USB/Firewire drives. And economy is always a factor here.
The desktop G4 (which I assumed would be the recipient of the salvaged iTunes) possesses the old and slow USB 1.1, as well as Firewire. My PC possesses USB 2.0.
A USB enclosure should work with either USB 1.1 or 2.0 ports. But it'll be terribly slow on the 1.1 version.
The G4 desktop now had its original large hard drive PLUS the near 500 GB second drive I'd just installed. As well as a rewritable DVD installed by my brother-in-law.
So a USB only enclosure would be awfully slow for the G4 desktop, but near as fast as Firewire on my PC.
However, I also learned that both USB and Firewire enclosures often required more power than provided by those interfaces to actually work in real life. And so it'd be best to get some sort of power adapter or other supplementary power feed, too.
Also, a combo USB/Firewire drive would definitely be the most versatile over the long run, even if somewhat more expensive.
Most laptop hard drives are classified as 2.5 inch, and desktop drives 3.5 inch (though actual measurements are somewhat larger). 3.5 inch enclosures often came with tiny cooling fans and power adapters by default, while the 2.5 inchers did not.
Both manufacturers and consumers tended to take chances that the tiny laptop drives could function solely off the bus power, as well as without auxiliary cooling.
Metal cases-- usually aluminum-- were recommended across the board for 2.5 inch drives online. For cooling purposes.
Maddeningly, from what I could gather, the same caveats and risks applied to drive enclosures no matter the brand name or even cost(!) Grrr.
I could find extremely few credible seeming reviews of drive enclosures on the net. And what few did exist were many years old, or often covering only high end multiple drive RAID enclosures such as someone like Google might buy. Agh!
Some of the sites I consulted included:
InformIT: Reincarnate Your IDE Hard Drives as USB External Hard Drives > Gathering the Ingredients
What is a Hard Drive Enclosure?
Looking for good external hard drive/enclosure? - Mac-Forums.com
How do I Build and configure an external hard drive enclosure? TechRepublic.com
Build Your Own External Hard Drive - Computer Shopper
Alpha Geek: Turn an old hard drive into an external drive
The official external ENCLOSURE thread
HOWTO Build Your Own External Hard Drive
ultra ata/100 hard drive enclosure - Google Search
So with all this in mind I went shopping.
Years back I bought from Newegg.com. But they severely annoyed me the last time I shopped there. Plus their prices don't seem as good as they used to be.
Before Newegg, I shopped at TigerDirect.com. But something similar happened there.
And at least one big-name online store is actually just a façade for hundreds or thousands of smaller ones. That's not a bad thing in itself-- until you end up getting a separate shipping charge for every item in a multiple item list. With no warning beforehand. Egads! You can end up with shipping charges alone costing you more than your entire list of items themselves!
So I didn't really know where to go shopping at, either.
So I Googled the type of item I was looking for, and began there.
The closest thing I could find to the theoretical ideal at minimal cost was at geeks.com. But I didn't buy then. I'd run out of steam on this particular chore, plus had lots of other duties I had to perform for a while. And I needed to digest what I'd learned about all this.
A week later I did a fresh new round of such shopping searches-- and lo and behold couldn't beat what I'd found at geeks.com the week before. So I bit. Knowing that no matter how much study I put into it, I might still end up with a non-working enclosure. And even if the enclosure worked, the drive could turn out to be dead as a door nail.
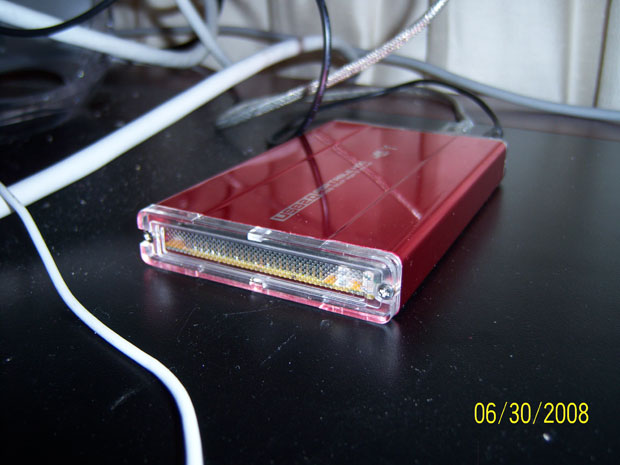
I went for a metal enclosure with both USB and Firewire I/O, and an extra USB cable for a power feed. For $15.99.
The slowest possible shipping was $11.00(!) Maybe because of our glorious President's wonderful way of making life on Earth Hellish for the rest of us.
I then moved on to other chores during the possibly week-long wait for the enclosure.
Almost exactly a week (seven days) after I ordered it, the enclosure arrived.
It was pretty much as advertised on geeks.com. But there were ZERO instructions with the thing(!) This seems unusual for a computer accessory in my experience. I noticed a couple of the ports on the back end seemed non-standard.
A screwdriver was included.
As usual, I prepped my work area with all the items required, including extra lighting and my wrist grounding strap.
I decided to unscrew and remove the back plate (containing the ports), which turned out to be the proper one.
It turned out I needed to remove the original laptop connector from the hard drive before I could install it into the enclosure. Accomplishing this without damaging something is NOT a trivial task!
Plus, it's not necessarily obvious where exactly the proper disconnection point for the gear is situated. It turned out that the hard drive had a couple rows of male pins, mated to a black plastic female connector from the laptop. The edges of that connector sort of dip down into the hard drive case dimensions a bit, and underneath some sort of plastic sheet which was wrapped around the bottom of the hard drive, and held on by four screws in the sides. So not only is that edge hard to discern, but it's hard to get at, too.
For you have to pry this connector off the hard drive pins. Using considerable force. Without damaging anything. Using some pretty small tool points or edges to do it. And do it evenly across something like 40 or 50 pins at once, so that you don't bend anything.
Sheesh!
Note that there's several items which can lure you into messing with the wrong thing here. There's the short ribbon cable attached to the connector that links to the laptop innards. Which seems to have its own plug on the outside of the important connector. If you're not careful you might jerk this ribbon cable out of the connector, thereby ruining it, and still not accomplishing your aim.
There's also a little dark strip of rubber or plastic situated outside where the ribbon goes into the connector, to further befuddle you.
But what you truly have to do is ignore all that exterior junk, and focus on using something like a fairly small flat head screwdriver to pry the female laptop connector off the hard drive's male pins, using the metal edge of the hard drive nearby for leverage.
This is a delicate maneuver, which must be performed many times in small nudges all around the connector, to pull it off in an even fashion.
After finally getting the ribbon cable loose, I slid the little drawer out of the new enclosure in order to place the hard drive in it.
Uh oh. It wasn't readily apparent how the hard drive went into the enclosure. This side up? Or the other?
And there were extra pins. More pins on the hard drive itself than could be accounted for in the female connector of the enclosure drawer.
Questions, questions. Maybe things would have been a bit easier if I still had my original near-sightedness, rather than this new set of lenses I'm still getting accustomed to after my operations.
OK. To figure out which side of the drive went up inside the enclosure, I closely inspected the drawer's female connector: its vertical distance from the bottom of the drawer would allow the pins on the drive to properly engage only if one particular side faced down.
One question answered!
As for the extra pins, they were a set slightly removed from the main array on the drive. Having recently dealt with another hard drive installation, I realized the extra pins were likely the spot for configuring the drive as slave, master, or other settings, with a tiny jumper device.
There was no jumper on this hard drive, and none included in the enclosure kit, as well as no instructions about properly setting a drive here. Plus, I was definitely changing the drive's status from an internal default to an external non-default.
Hmmm.
Fortunately, if I needed it (and if it fit) I still had the jumper which I'd removed from the desktop G4's second internal drive install some days before.
Plus, from what I could recall about looking up jumper settings for that previous case, I believed the proper configuration for this install would be no jumper at all, too.
So I would ignore the jumper pins, and just worry about getting the main male pin array into the enclosure drawer's female connector.
Whoa! The quarters inside the drawer were really tight! Very little spare room provided for inserting a hard drive and then connecting it to the female plug.
It was also tough to see if I was getting all the pins properly seated, and fully inserted. And difficult to apply with fingertip pressure alone sufficient force to get everything together (these are all pretty darn small items!).
I repeatedly used a flashlight to peer at the sides of the connector from different angles to see if the gap was fully closed.
Eureka! I got it connected!
I thought oh boy, this baby's going to be ready to test in another minute...!
But I was wrong.
When I went to slide the drawer back into the enclosure, it turned out there were two humongous screw assemblies on each side of the drive which wouldn't allow it to enter the box.
By assemblies, I mean the screws had big rubber washers on them. By humongous, I mean their size relative to the itty bitty drive to which they were attached.
It seemed obvious the screws would have to be removed or replaced before the drive drawer could be slid into the enclosure. But as the screws made up a considerable chunk of the bulk of the drive itself, it seemed risky to do so.
Plus, there was a tiny zip lock bag of four washer-less screws which had come with the enclosure kit itself, which looked like maybe they were meant to replace them-- or something.
Remember: absolutely no instructions had accompanied this kit.
I decided to check the internet for any warnings or further info on this point.
I guess I feared removing the screws might somehow cause the itty bitty drive to fall apart. Or something critical inside come loose.
Alas, I could find no relevant info. So I proceeded on my own.
I compared the zip lock screws with those a part of the drive, in terms of likely drawer clearance, and determined replacing the current screws wouldn't help.
So I just removed them. Thankfully I didn't hear anything come loose inside the drive as a result.
After that the drawer slid in fairly easily. Though the plastic sheet liner around the bottom of the drive interfered with it slightly.
I thought about removing the liner, but gentle tugs wouldn't free it from its place even with the screws removed.
It seemed the best time to remove the liner would have been before plugging the drive into the drawer. And I definitely didn't want to disconnect and reconnect again, if I could avoid it!
Now though I wondered if letting the liner remain in place would hurt the drive cooling-wise? For cooling was said to be an important issue in such enclosed drives like this one was going to be.
Plus, the liner might still be necessary. For it had served some purpose inside the laptop, possibly protecting hard drive circuitry from directly touching other electrical items in the close quarters.
I couldn't recall now if the drawer bottom had possessed anything which might justify the liner's protection of the drive there.
Hmmm.
So I left the liner in place. Closed up the enclosure with the two screws initially removed. Then headed for the desktop G4.
Elsewhere on-site I have written (or will write) about an external hard drive I recently added to my PC. Among the instructions for that was the warning to only use a USB or Firewire cable with the device-- not both at once.
Like that external, the new enclosure too possessed both USB and Firewire interfaces.
I intended to copy over the entire drive contents to the G4 as fast as possible, just in case the old laptop drive went kaput pretty soon.
So I decided to use the Firewire cable. I thought Firewire would provide a power feed to a little drive like this, as well as transfer data.
I booted up the desktop G4, then attached the Firewire cable. But no go.
The laptop drive appeared dead. The desktop didn't see it.
Besides the Firewire cable, the enclosure kit had also included two USB cables. One for data transfer, and one for power.
From the guidance I'd received about my PC external, I didn't think I was supposed to try using the USB power cable simultaneously with the Firewire cable. But the kit had not included a separate Firewire power cable.
So I connected up the USB power cable between the enclosure and the desktop G4. Then reconnected the Firewire data cable. But NOT the USB data cable.
And it worked!
I soon had the G4 copying almost everything from the external drive-- though OS X warned me some things I wasn't allowed to copy.
It took over an hour for the near 60 GB to be transferred.
I figure the stuff which wouldn't copy was most likely the very things my brother-in-law was most concerned about salvaging: his iTunes collection.
But we've got another family member who can help him with transferring his iTunes between drives lots better than me-- since I've not been a Mac user since 2001, and have never even opened the iTunes application, I believe. Freeing his data from the dead laptop was my part.
I guess a little of my geekness is still intact these days.
As for satisfactory cooling, keeping that drive constantly transferring data for more than a hour had to be a pretty good test. For it's unlikely to have to work that hard ever again. And it survived. Though the case did get noticeably warm to the touch.
So it seems so long as anyone doesn't go out of their way to get it hot by piling thermally insulating materials atop it, or using it in a stifling hot environment, it should work fine for years in its new enclosure.
I realize this page could qualify for a review of a hard drive enclosure which works. BUT...the enclosure I bought seems very generic in nature, with its physical packaging such as you'd see on a store shelf even misleading in a way (the web site warned buyers about the packaging).
Plus, this particular item may be discontinued now, as geeks.com indicated they were running out of stock, and didn't offer any assurances there'd be more later. At last check 6-29-08 the link was still working, but said they were out of stock.
But here's the link and related info anyway, just in case it might prove helpful to you:
2.5" USB 2.0/FireWire Aluminum Ext IDE HDD Enclosure (Red) 203-U2IE (2.5 USB 2.0/FireWire Aluminum Ext IDE HDD Enclosure (Red) 203-U2IE )
The box looks like this (front and back views, unfolded and flattened for a scanner)


I hope this helps others out there in this predicament!
PS: I got the impression from my brother-in-law he had an Apple tech check out the dead laptop, and was told it seemed to have a cracked motherboard. And so the only solution would be buying a new and supremely expensive motherboard replacement.
Well, I had to get pretty intimate with this Powerbook to extract the hard drive. And I could find no crack in the motherboard. Plus, I saw no signs the Powerbook had been disassembled for such an inspection since it left the factory, either.
I did see evidence of maybe some foreign material here and there inside the device. Bits of a sort of light colored powder, like I recall seeing sometimes collect around car battery terminals decades back. Maybe that's normal: I have no idea what's normal for laptops. But in all the desktops I ever explored the innards of, I didn't come across stuff like this. But dust, dust bunnies, and even bugs and spider webs instead.
I can't help wondering now if that laptop was really dead when I took it apart. And wish I'd done some online research and more hands-on experimentation first in that regard.
Especially after I recalled somewhat later that the desktop G4 had acted precisely the same as witnessed for the laptop, a few years back. And I think we overcame that by removing the PRAM battery for 8-12 solid hours. Hmmm...
Well, as I tried to be cautious in my disassembly, a reassembly and further repairs for the laptop are not entirely out of the question. Once my brother-in-law gets his iTunes off the salvaged hard drive, I may ask him if he wants to leave the hard drive and other pieces of the laptop here with me to dabble with over time, to see if I can bring it back to life in an economical fashion...
As I lucked out and got a discarded 120 GB external hard drive to alleviate the mounting disk space crisis on my PC, I no longer have the interest in the old laptop drive for my own possible use, as I did some weeks back.
I also loathe laptops for my own personal use, for reasons I've listed elsewhere on site in previous years. So about the only interests I'd have in trying to get the laptop running again now would be curiosity, the geek challenge, and re-empowering my brother-in-law with the portable computing power he once possessed-- as well as helping him recoup the enormous investment I know he must have in the machine (Apple laptops are notoriously expensive).
Plus, I guess I'd get some small satisfaction in whatever extra revenue I might prevent Apple/Steve Jobs from collecting due to yet another dead Powerbook existing in the world.